Playing With A Microphone
by Paul R. Coats
You go to your first gig with a Rock & Roll band and you realize you need a microphone to keep up with the guitar, bass, synth, drums, etc. The drummer digs around in the back of the trailer and comes up with an old mic and a stand with a broken holder, so that you have to duct tape the mic to the stand. This is not going to be a fun night.
You need your own microphone, stand, and cables if you are going to be a musician. I am not going to tell you to go out and buy a bunch of recording studio quality equipment, but will describe a basic setup that will serve you well for quite a few years. Going wireless is simple, buy a Nady, Shure, AKG, or Audio-Technica setup. These are complete with mic, bell clip, transmitter, and receiver.
Microphones: A simple “highball” type dynamic microphone is a good starting point. It should be “Unidirectional” or “Cardioid”, not “Omni-directional”. Omni’s pick up sound equally from all directions, meaning drums, chair scrapes, crowd noise, and feedback. Unidirectional, aka cardioid, mics pick up strongest in one direction, weaker to the sides, least to the rear. “Dynamic” means they produce signal from the power of the sound–no batteries. “Hey, my batteries are shot–I need to run down to the little store during the break.” Yeah, sure. Buy a dynamic mic. The Shure SM57 and SM58 have long been the “workhorse of the stage”. These mics are “low impedance”–this means they are resistant to noise and hum. Most mics come with cables and stand adapters (mic holders).
Your mic should have a cable connector that allows the cable to be plugged into the back of the mic, not a permanently attached cable. The connections on each end should be male/female XLR (also called low impedance) connectors. Most modern PA’s will have XLR inputs, but if not, you can adapt with an adapter/transformer such as Radio Shack #274-016. This has XLR jack to 1/4″ plug. A mic with a permanently attached cable and 1/4″ plug (like a guitar cable) is high impedance. The XLR connectors are about 1/2″ diameter with three prongs or holes in a triangle pattern on the end. A low impedance mic will usually, but not always, come with a 15′–20′ cable. You should also buy at least one extra 25′ cable. If no cable came with the microphone, buy two 25′ cables. This will allow some flexibility in setup. Colored cables are easier to see on a dark stage floor than black cables. A brightly colored cable will help you avoid trips and damaged equipment. Sounds silly, but what if you trip over a cable with your $4000 sax in your hands? Hmmmm?
http://www.speakerrepair.com/Merchant2/merchant.mvc?Screen=CTGY&Store_Code=genem&Category_Code=AG+Accessories
Buy a foam windscreen to slip over the mic head. This will keep the noise down when you bump the mic with the bell of your sax. You may also wish to color code your cables and mic with colored vinyl tape. Use two different colors so it will stand out from other people’s coding. Not only can you tell which cables are yours at the end of the gig, but the sound man can see the coding on your mic and connectors, and follow it back to the mixing board and see which channel you are plugged into.
I prefer to use a stand with folding legs, rather than the type with a large round weight for the base. Also, a mic boom is a necessity. The folding stand is easier to store and doesn’t roll around in the back of the truck or trunk like a stand with a round cast iron base. The boom makes for easier positioning of the mic, especially when sitting and playing from a music stand such as in stage band.
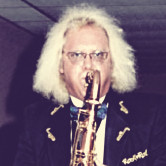
For alto, tenor, and bari saxes do not stick the mic into the bell. When standing in your soloing position the mic should be about 3″ to 6″ from the bell and about even with your left hand. Adjust the mic and boom so that the mic is angled down about 30 degrees below horizontal.
Straight soprano sax and clarinet are a little more of a problem, but I’ll let you in on a big secret. Don’t mic these at the bell when using a single mic. Use the mic and stand in the same position as you would have it for alto or tenor sax. The mic should be about 6″ to 12″ above the middle of the body of the soprano sax or clarinet. Simple. (See also: Curved vs. Straight Soprano Saxophones)
Speakers: Nothing smaller than a 12″ woofer on the PA mains will do the job for sax. 15″ and 18″ woofers are much better. You want a two way (woofer and high frequency horn) or three way (woofer, horn mid, and horn tweeter) speaker system. Don’t overdo the bass on your channel on the mixer. I turn the bass down about -3 dB. Turn up the treble or high knob just a touch, +3 dB or so. If the settings give a boomy sound to voice, you have too much bass. If the S’s sizzle, you have too much treble. If voice lacks definition, you have too little treble. If the PA is adjusted to give a natural, intelligible sound to the male speaking voice, the PA is adjusted well for sax. Just a touch of reverb is OK, but you don’t want slapback or echo–just a little warmth added to the room sound.
For most venues, small clubs, school auditoriums, and most small town civic auditoriums, a 150 to 300 watt PA amp is plenty of power. A small 8 to 16 channel mixer or PA head will usually do well for stage band. Three to four mics for saxes, two for bones, two for trumpets, and a solo mic or two out to the side will usually suffice. Keep the PA low, using just enough volume to balance the saxes with the brass. Then turn up the master gain just enough to balance the horns with the drums. Bass, guitar, and synth should have their own amps, but these can be kept low. Turn up the bass enough to balance with the drums. Then add guitar and synth. Now adjust the main on the PA to balance the horns with the rhythm section. We’re cookin’ now…